> ## Documentation Index
> Fetch the complete documentation index at: https://docs.logical.io/llms.txt
> Use this file to discover all available pages before exploring further.
# Installation
> Learn how to install Logical on your desktop.
## Download Logical
Getting started with Logical is simple. Follow these steps to download and install the application.
Visit our download page and enter your private beta invitation key (found in your invitation email) along with some quick details about yourself.
Make sure to use the invitation key from your beta invitation email. This key is required to access the download.
Once downloaded, open the `.dmg` file and drag Logical to your Applications folder.
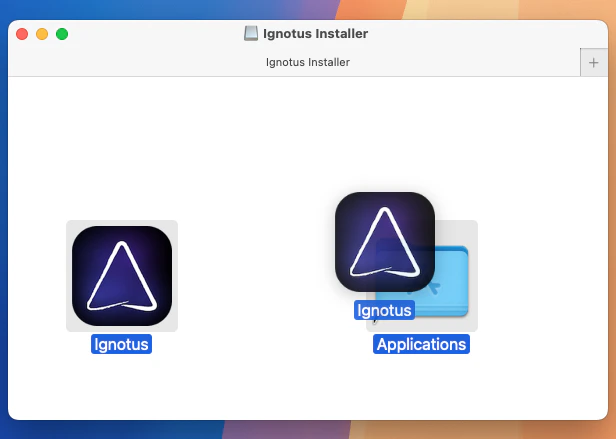 Find Logical in your Applications folder and double-click to open it.
## First-Time Setup
When you launch Logical for the first time, you'll be guided through an onboarding wizard.
The setup wizard will prompt you to enter your private beta invitation key again to activate your account.
Find Logical in your Applications folder and double-click to open it.
## First-Time Setup
When you launch Logical for the first time, you'll be guided through an onboarding wizard.
The setup wizard will prompt you to enter your private beta invitation key again to activate your account.
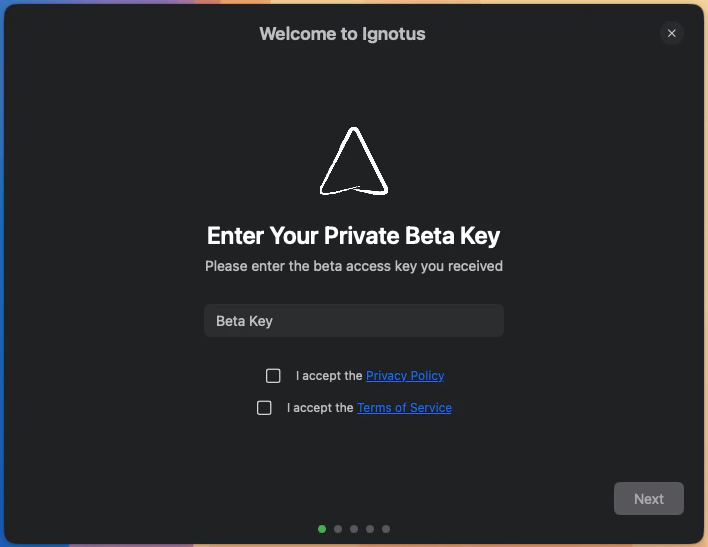 Next, you'll configure your privacy preferences. These settings control how Logical interacts with your applications and data.
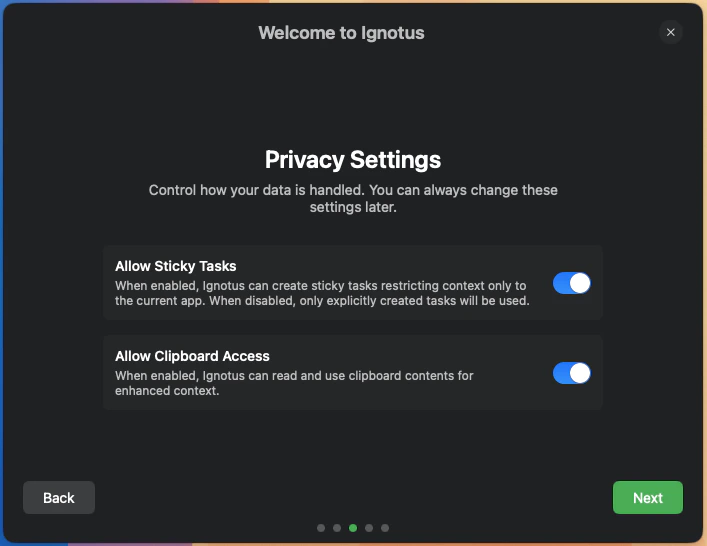 You can always change these settings later from the main application preferences.
Logical needs two key permissions to work properly:
* **Screen Recording**: This allows Logical to capture and analyze your screen.
* **Accessibility**: This allows Logical to detect focus changes and other important events.
After granting the screen recording permission, you may have to restart Logical for the changes to take effect. Please refer to the [troubleshooting](/troubleshooting) guide if you encounter any issues.
## Next Steps
Congratulations! Logical is now installed and ready to use. To get the most out of the application, we recommend following our [Quick Start Guide](/quickstart) to learn the essential features and workflows.
Need help? If you encounter any issues during installation, please refer to the [troubleshooting](/troubleshooting) guide or contact us at [hello@trylogical.ai](mailto:hello@trylogical.ai).
You can always change these settings later from the main application preferences.
Logical needs two key permissions to work properly:
* **Screen Recording**: This allows Logical to capture and analyze your screen.
* **Accessibility**: This allows Logical to detect focus changes and other important events.
After granting the screen recording permission, you may have to restart Logical for the changes to take effect. Please refer to the [troubleshooting](/troubleshooting) guide if you encounter any issues.
## Next Steps
Congratulations! Logical is now installed and ready to use. To get the most out of the application, we recommend following our [Quick Start Guide](/quickstart) to learn the essential features and workflows.
Need help? If you encounter any issues during installation, please refer to the [troubleshooting](/troubleshooting) guide or contact us at [hello@trylogical.ai](mailto:hello@trylogical.ai).